How Do You Prepare a Roof for Installation?
Essential Steps and Tips
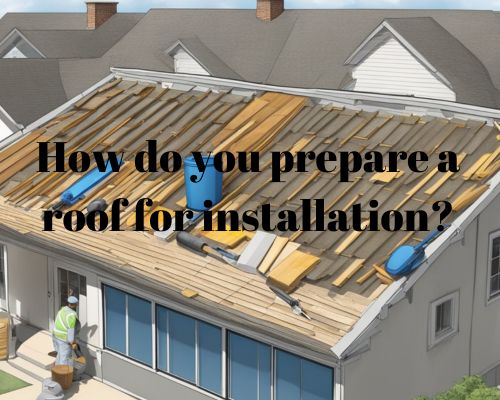
Preparing a roof for installation is an essential step to ensure a successful and durable roofing project. Whether you’re replacing an old roof or installing a new one, proper preparation can make all the difference.
Begin by thoroughly inspecting your existing roof structure for any damage or weaknesses. This inspection helps identify any repairs needed before you start the installation process.

After inspection, the next crucial step is to remove the old roofing materials. This involves stripping away the old shingles, nails, and any other debris that might hinder the new installation.
Make sure to clean the surface completely to provide a solid foundation for the new roof.
Once you’ve prepared the surface, gather all necessary materials and tools for the installation. These typically include roofing felt, underlayment, shingles, nails, and a reliable ladder.
Having everything on hand will streamline the process and minimize interruptions.
David Spade from Star Roofing Contractors highlights that proper preparation sets the stage for a smooth roof installation, ensuring your home remains protected and resilient.
Pre-Installation Assessment and Planning
Effective preparation ensures that your roofing project proceeds smoothly and successfully. Key steps include evaluating the current roof’s condition, selecting the appropriate roofing materials, acquiring necessary permits, and taking safety precautions. Let us know these with David Spade from Star Roofing Contractors.
Evaluating the Current Roof Condition
Begin by conducting a thorough inspection of your existing roof. Look for damaged areas, such as missing or broken shingles, and note any signs of water damage or leaks.
This assessment helps identify potential repairs needed before new material installation.
Check for structural issues that might affect the installation, such as sagging sections or rot in the roofing structure.
Use this information to determine the scope of work and any additional materials required.
Choosing Roofing Material
Select the best roofing material for your budget, climate, and aesthetic preferences.
Asphalt shingles are popular for their affordability and ease of installation.
Consider metal panels for durability and weather resistance, or clay tiles for a classic look.
Slate tiles provide a long-lasting and high-end option, though they are more expensive.
Evaluate the pros and cons of each material and consider consulting a professional to ensure your choice is optimal for your home’s specific needs.
Permit Acquisition and Legal Requirements
Check your local regulations regarding roof installations. Many municipalities require a permit for roofing projects.
Contact your local building department to understand the specific requirements and fees.
Ensure all legal requirements are met before beginning work to avoid potential fines or delays.
Your contractor can often assist with the permit acquisition process and advise on any additional legal considerations.
Safety Preparations and Site Setup
Prioritize safety by preparing your site properly.
Use a sturdy ladder and ensure all safety equipment, such as harnesses and hard hats, are in good condition.
Clear the area around your home, moving patio furniture and other items out of the workspace.
Notify neighbors about the project to minimize disruptions.
Protect driveways and sprinklers from potential damage due to falling debris.
Secure any fragile items that might be affected by the installation activities, ensuring a safe environment for everyone involved.
Roof Installation Process
A detailed roof installation ensures durability and functionality. Key stages include preparing the roof deck, installing underlayment and flashing, and placing shingles and ventilation components.
Preparing the Roof Deck
Ensuring a solid foundation for your roof means beginning with a properly prepared roof deck.
Remove any old shingles and debris thoroughly.
Inspect the deck for signs of rot or damage.
Replace any damaged wood to ensure a stable base.
To prevent moisture from underneath, apply an ice and water shield at the eaves and valley areas.
This step is critical for climates with heavy snowfall or rainfall.
Installing Underlayment and Flashing
Install underlayment over the roof deck to provide an additional layer of protection against water infiltration.
Use synthetic or asphalt-saturated felt underlayment.
Start at the lower edge and overlap each row. Ensure proper coverage and avoid wrinkles to ensure an even surface.
Place flashing around roof features such as chimneys, vents, and valleys.
Flashings help manage water flow and prevent leaks.
Use roofing nails to secure flashings, ensuring they fit snugly to their respective areas.
Shingle and Ventilation Installation
Begin shingle installation with starter shingles along the edge. This helps create a seal and prevents water infiltration.
Lay roof shingles following the manufacturer’s guidelines, ensuring each row overlaps the one below it.
Ensure alignment and secure each shingle with roofing nails at the specified points.
Install ridge vents and other ventilation components to facilitate airflow and prevent moisture build-up.
Proper ventilation extends the life of your roof by reducing heat and moisture.
Finishing Touches and Clean-Up
Install drip edges along the eaves and rakes to direct water away from the roof structure.
Secure cap shingles at the ridges for additional protection and a finished look. Make sure to properly drive in and cover all nails to prevent rust and leakage.
Finish by thoroughly cleaning the site. This will remove all debris to ensure proper drainage. Also, inspect the roof for any missed spots or loose materials.