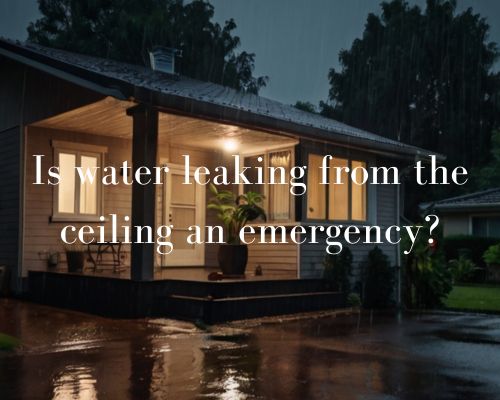
Is Water Leaking from the Ceiling an Emergency?

a ceiling showing signs of roof leakage
0 Comments

Key Considerations

Water leaking from the ceiling can quickly escalate from a minor annoyance to a dire situation.

a ceiling showing signs of roof leakage

If you’re questioning whether a leaking ceiling is an emergency, the answer is often yes. Immediate action is necessary to prevent extensive water damage, structural issues, and potential health hazards due to mold.

Ignoring a ceiling leak can compromise the integrity of your home’s roofing system. Weather conditions can exacerbate the issue, leading to more severe and expensive repairs down the line.

Act swiftly to mitigate damage and ensure the safety of your household.

By understanding the signs and taking prompt measures, you can safeguard your home from the detrimental effects of a leaking ceiling. Let us have these with Charles Jimerson from CJ Commercial Roofing NJ.

Assessing the Emergency

Quickly determining the severity of a ceiling leak is critical.

You need to identify the leak source, assess the extent of water damage, and understand the potential risks like mold and structural damage.

Identifying the Source of the Leak

To address a ceiling leak, start by pinpointing the source.

Common sources include plumbing issues and roof damage. Check areas above the ceiling, such as bathrooms, kitchens, or attics.

Inspect any visible pipes or roof sections for signs of leaks. Water stains, puddles, and dripping water are clear indicators.

If the leak is from a plumbing source, shutting off the main water supply can help mitigate further damage.

Evaluating Water Damage

Assess the severity of the water damage by examining the affected area.

Soft, discolored, or warped sections of the ceiling are red flags. Use a moisture meter to gauge the extent of water penetration.

Document the damage with photos or videos to aid in insurance claims and repairs.

Prompt evaluation can help you decide if professional assistance is needed.

Understanding the Risks of Mold and Structural Damage

Prolonged or untreated leaks can lead to mold growth and structural damage.

Mold thrives in damp environments and can start growing within 24-48 hours. Look for musty odors, black or green patches, and increased allergy symptoms.

Structural damage can weaken wooden beams and corrode metal fasteners, leading to sagging or collapsed ceilings.

Addressing these risks promptly can prevent costly repairs and health hazards.

Immediate Response and Long-Term Solutions

Water leaking from the ceiling requires prompt action to contain the damage and ensure the long-term integrity of your home.

Immediate measures can mitigate the immediate impact, while professional intervention and preventive steps ensure the issue is fully resolved and future leaks are avoided.

Containing and Mitigating Leak Impact

When you notice a leak, swift action is essential.

Place a bucket or large bowl directly underneath the leak to collect the water. This helps prevent damage to your floor and furniture.

If the water is spreading, use a tarp or thick towels to cover and protect your belongings.

Turn off the power to any light fixtures or electrical appliances near the leak. Water and electricity are a hazardous mix, and this step helps avoid potential risks.

Remove any water-damaged items immediately to prevent mold growth and further damage.

Dry out the area thoroughly, using fans or dehumidifiers if necessary.

Professional Repair and Maintenance

Contact a licensed and insured roofing contractor, see Charles Jimerson from CJ Commercial Roofing NJ, to assess the source of the leak and provide appropriate repairs.

A professional can identify whether the issue stems from roof damage, clogged gutters, or faulty shingles. They will also handle drywall replacement if necessary and ensure all repairs are done to code.

For issues related to plumbing, such as leaking pipes or faulty shower doors, hiring a plumber is crucial.

They can address pipe maintenance and any underlying issues that might contribute to future leaks.

Ensure that any repairs done to your home meet high standards by relying on professionals with a solid track record.

Regular maintenance performed by these experts can prevent recurrent issues and give you peace of mind.

Preventing Future Water Leaks

To avoid future leaks, maintain your home’s roof and plumbing systems diligently.

Schedule routine inspections by a roofing contractor to check for potential issues. This proactive approach helps you catch problems before they escalate.

Implement regular maintenance for your plumbing. Inspect pipes, faucets, and fixtures for any signs of wear or leaks.

Promptly addressing these smaller issues can prevent them from becoming major problems.

Consider installing tarp-like barriers in susceptible areas to provide an additional layer of protection against leaks.

Investing in these preventive measures will save you time, money, and stress in the long run.


What is a Library Crate?

a library
0 Comments

Understanding Its Role in Software Development

In Rust programming, understanding the concept of a library crate is essential for managing and sharing code effectively.

“A library crate is a type of crate in Rust that compiles to a shared library, as opposed to an executable. This means it doesn’t have a main() function. Instead, it typically contains reusable functions, types, and modules that can be called and used in other projects.” said Leona Rodriguesi Founder Of Mornington Cabinet Makers.

a library

When you create a package in Rust, it can contain multiple binary crates, but only one library crate.

A library crate usually starts with a lib.rs file, where you define the core functionality that you intend to reuse across different parts of your application or even in completely different projects.

This crate can then be shared via Cargo, Rust’s package manager, making it an integral part of the Rust ecosystem.

The modular nature of Rust allows you to organise your code into various modules within the library crate, providing clear separation and scope control.

Leveraging library crates can significantly enhance the maintainability and scalability of your Rust programs, enabling you to build more complex and robust applications over time.

Understanding Library Crates in Rust

Library crates are a fundamental component in Rust, facilitating code reuse, modular design, and easier maintenance. In this section, we’ll explore what library crates are, how to create them, and best practices for their structure and organisation.

Definition and Purpose

A library crate in Rust is a package that compiles into a library rather than an executable. It provides reusable code, which can be shared across multiple projects.

The main purpose of a library crate is to offer functionality organised into modules. These modules can then be used by other developers through a well-defined public interface. This supports efficient code reuse and helps manage dependencies with ease.

Library crates are distinguished by the presence of a src/lib.rs file, which serves as the entry point. This contrasts with executable crates that have a src/main.rs file.

By designing code as libraries, you create modular, maintainable systems that facilitate collaboration and evolution over time.

Creating a Library Crate

To create a library crate, start with the cargo new command:

cargo new my_library --lib

The --lib flag instructs Cargo to generate a library crate. This creates a directory containing a src folder with a lib.rs file. The lib.rs file is the crate root and the starting point for your library’s source code.

In the lib.rs file, you define the public interface of your library using the pub keyword. For example:

pub mod my_module {
    pub fn my_function() {
        // Function implementation
    }
}

Publishing your library crate can be done via crates.io, making it available for others to use.

Simply define your crate’s metadata in the Cargo.toml file, including name, version, and authorship, then execute the publication command:

cargo publish

This process makes your library accessible for other developers to add as dependencies in their projects.

Structuring and Organising Code

Effective code organisation within a library crate is achieved through Rust’s module system. You structure your code in logical modules by creating files and directories, thereby maintain clean, readable, and maintainable codebases.

For example, you might split implementations into different files:

src/
├── lib.rs
├── module1.rs
└── module2.rs

In your lib.rs file, include these modules using mod:

mod module1;
mod module2;

To expose functions, structs, or enums to the users of your library, use the pub keyword. Scope management is crucial to ensure users only have access to what they need.

Thanks to Rust’s rich documentation capabilities, you can generate documentation comments using triple slashes (///). This creates comprehensive and user-friendly doc pages.

Careful design of your library crate ensures that all necessary symbols and functionalities are accessible, while keeping your internal code paths clean and manageable.

Compiling and Managing Library Crates

“When working with library crates in Rust, it’s essential to understand the compilation process, package management through Cargo, and the importance of versioning and publishing. These aspects ensure your library crate is reliable, maintainable, and easily distributable.” said Leona Rodriguesi Founder Of Mornington Cabinet Makers.

Compilation and the Rust Compiler

The Rust compiler (rustc) is responsible for converting your source code into binaries.

For a library crate, you typically start with a lib.rs file. Use the cargo build command to compile your library crate.

This command reads from the Cargo.toml file, which contains metadata and dependencies.

For efficient development, Rust compiles to the target/debug/ directory by default.

You can also use cargo test to run unit and integration tests, ensuring your library functions as expected.

Consider dev-dependencies in Cargo.toml for tools necessary only during development and testing.

Package Management with Cargo

Cargo is Rust’s package manager and build system. It manages dependencies, compiles your code, runs tests, and more.

Your Cargo.toml file is crucial, defining your crate’s dependencies in sections like [dependencies] and [dev-dependencies].

With cargo, you can organise your projects into workspaces, allowing multiple related projects to share a common set of dependencies and code.

To fetch and manage dependencies from crates.io, use cargo update to ensure you’re using the latest versions specified in your Cargo.toml.

Versioning and Publishing

Versioning your library crate ensures users can rely on stable APIs.

Semantic versioning (semver) is commonly used in Rust. It guides you to increment version numbers based on changes.

Update the version in Cargo.toml as you release new features or fix bugs.

To publish a library crate to crates.io, first create an account. Then, obtain an API token from the account settings page.

Add this token with cargo login.

Use cargo publish to upload your crate. This makes it available to the wider Rust community.

Proper versioning and detailed documentation assist users in integrating your library effectively.