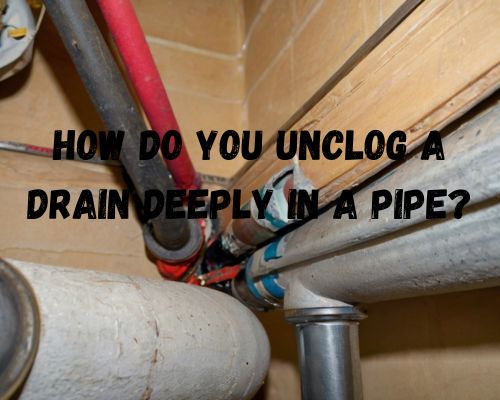
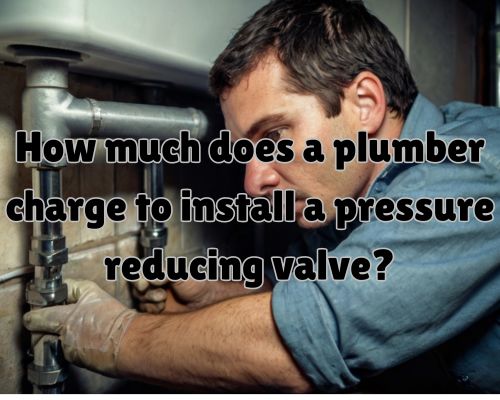
How Much Does a Plumber Charge to Install a Pressure Reducing Valve?

plumber working on home pipe
0 Comments

A Comprehensive Guide

If you are experiencing high water pressure in your home, installing a pressure reducing valve (PRV) can help to regulate the water pressure to a safe and consistent level.

A PRV is a device that is installed on your main water line. It works to reduce the incoming water pressure to a safe level.

But how much can you expect to pay for a plumber to install a PRV in your home? Let us know it with Dean Owens of Plumber Warragul.

plumber working on home pipe

According to our research, the cost to install a pressure reducing valve can vary depending on a few factors.

If you decide to install the valve yourself, you can expect to pay anywhere from $50 to $200 for the valve itself, plus any additional parts or tools you may need.

However, if you choose to hire a professional plumber to install the valve for you, you can expect to pay anywhere from $300 to $700. The cost depends on the complexity of the installation and your location.

It’s important to note that installing a pressure reducing valve is not a DIY project for everyone.

If you are not experienced with plumbing or do not feel comfortable working with your main water line, it’s best to hire a licensed plumber to do the job for you.

While the cost may be higher upfront, the peace of mind that comes with knowing the job was done correctly and safely is worth it in the long run.

Understanding Pressure Reducing Valves

If you are experiencing high water pressure in your home, it is important to install a pressure reducing valve (PRV) to regulate the water pressure.

In this section, we will discuss what a pressure reducing valve is, the significance of water pressure control and the components of a pressure reducing valve.

What Is a Pressure Reducing Valve?

A pressure reducing valve is a device that is installed in the main water line to regulate the water pressure. It reduces the high water pressure to a safe and manageable level, which prevents damage to your plumbing system and appliances. A pressure reducing valve works by restricting the water flow, which reduces the pressure downstream.

Significance of Water Pressure Control

High water pressure can cause damage to your plumbing system, appliances and fixtures. It can also waste water and increase your water bills.

A pressure reducing valve is essential to regulate the water pressure and prevent damage.

By installing a pressure reducing valve, you can protect your plumbing system and appliances from damage, conserve water and save money on your water bills.

Components of a Pressure Reducing Valve

A pressure reducing valve consists of several components that work together to regulate the water pressure. These components include:

  • Pressure gauge: A pressure gauge measures the water pressure and displays it on a dial.
  • Water pressure regulator: A water pressure regulator is a valve that regulates the water pressure.
  • Pressure reducing valve: A pressure reducing valve is a device that reduces the high water pressure to a safe and manageable level.
  • Expansion tank: An expansion tank is a device that absorbs the excess pressure in the plumbing system.

Cost Factors and Installation Process

Determining the Cost of Installation

The cost of installing a pressure reducing valve (PRV) can vary depending on several factors.

The average cost of a PRV installation by a professional plumber is around $300-$400. However, the cost may increase if additional fittings or materials are required, or if the installation process is complicated due to the location of the valve.

The size and material of the PRV can also affect the cost. Brass and bronze PRVs tend to be more expensive than aluminum ones. Additionally, the warranty and plumbing code requirements can also impact the cost of the PRV.

Labor costs are another factor that can affect the overall cost of installation.

Professional plumbers may charge different rates depending on their level of experience and the complexity of the installation process. Travel fees may also be included in the final cost, depending on the location of the property. But in Plumber Warragul, you will have a secure and quality work.

Installation Steps for a Pressure Reducing Valve

The installation process for a PRV involves several steps to ensure proper installation and functionality. The following steps are typically involved in a PRV installation:

  1. Turn off the main water supply and drain the pipes.
  2. Cut the pipe where the PRV will be installed.
  3. Install the PRV and fittings according to the manufacturer’s instructions.
  4. Use a soldering kit to connect the fittings to the pipes.
  5. Turn the main water supply back on and check for leaks.
  6. Adjust the PRV to the desired pressure level.

Post-Installation: Inspection and Maintenance

After the PRV installation, it is essential to have it inspected by a professional plumber. This ensures it was installed correctly and meets plumbing code requirements.

Regular maintenance is also necessary to ensure the PRV continues to function correctly and prevent high water bills.

Maintenance may include adjusting the PRV as needed, checking for leaks, and replacing the PRV if necessary.

It is recommended to have the PRV inspected and maintained by a professional plumber every few years. This will ensure proper functionality and prevent costly repairs.

The cost of installing a pressure reducing valve can vary depending on several factors. These include the size and material of the valve, location, and labor costs.

Proper installation and maintenance are crucial to ensure the PRV functions correctly. This helps prevent water hammer and high water bills.


How to Deeply Unclog a Drain in a Pipe

a-deeply-clogged-pipe
0 Comments

How to Deeply Unclog a Drain in a Pipe

If you’re dealing with a clogged drain, it can be a frustrating and messy experience.

Some clogs can be easily resolved with a plunger or drain cleaner, but others may need more effort to clear.

If you’ve tried these methods and still have a clog deep in the pipe, you may need to take additional steps to remove it. Let us have it with Dean Owens of Plumber Warragul.

a deeply clogged pipe

One option is to use an auger or plumbing snake. This tool is designed to break up and remove clogs that are deep in the pipe.

To use an auger, you’ll need to insert it into the drain and turn the handle to work it through the clog.

Once you’ve broken up the clog, you can pull the auger back out of the pipe and dispose of any debris that comes out with it.

If you’re not comfortable using an auger or don’t have one on hand, you can also try using hot water or a mixture of baking soda and vinegar to dissolve the clog.

If you’re still having trouble unclogging your drain, it may be time to call in a plumber.

A professional plumber will have the tools and expertise needed to remove even the most stubborn clogs.

They can also inspect your pipes to identify any underlying issues that may be contributing to the clog, such as tree roots or corrosion.

While it may be tempting to try and tackle a clog on your own, calling in a plumber can help ensure that the problem is resolved quickly and effectively.

Identifying and Preparing to Unclog Your Drain

Assessing the Blockage

Before you start to unclog your drain, you need to assess the blockage to determine the best course of action.

Is the blockage in the sink drain, bathtub, shower drain, or toilet? Knowing the location of the blockage will help you choose the right tools and methods to use.

Next, you need to determine the cause of the blockage. Is it caused by a buildup of grease, hair, soap scum, or a foreign object?

Knowing the cause of the blockage will help you prevent future clogs by changing your habits or using preventative measures.

Gathering Necessary Tools and Safety Gear

To unclog your drain, you will need some tools and safety gear. Here is a list of the items you will need:

  • Plunger
  • Drain snake or auger
  • Bucket
  • Wrench or pliers
  • Gloves (preferably rubber gloves)
  • Eye protection or safety glasses
  • Towels
  • Cleaning supplies

Make sure to wear gloves and eye protection to protect yourself from any harmful substances that may be in the drain.

Preparing the Work Area

Before you start to unclog your drain, you need to prepare the work area.

Clear any items from around the drain and place towels around the area to catch any water or debris that may come out of the drain.

If you are using a plunger, make sure the sink or bathtub is filled with enough water to cover the plunger head.

If you are using a drain snake or auger, make sure you have enough space to maneuver the tool through the drainpipe.

In addition, make sure you have access to hot water or boiling water to help loosen stubborn clogs.

Effective Techniques for Unclogging Drains

If you’re dealing with a clogged sink or shower drain, there are several effective techniques you can use to clear the blockage. In this section, we’ll explore some manual removal methods, chemical and natural solutions, and professional intervention options.

Manual Removal Methods

Manual removal methods involve physically removing the blockage from the drain. Here are some techniques you can try:

  • Plunger: A plunger is a common tool used to remove clogs. Place the plunger over the drain and push down and up to create suction. Repeat until the clog is cleared.
  • Cable or Auger: A cable or auger is a flexible tool with a handle used to remove clogs. Insert the cable into the drain and turn the handle to break up the blockage.
  • Wire Coat Hanger: Straighten a wire coat hanger and use it to manually remove the blockage. Bend the end of the hanger into a hook and insert it into the drain to pull out the clog.

Chemical and Natural Solutions

Chemical and natural solutions involve using substances to dissolve or break up the clog. Here are some solutions you can try:

  • Baking Soda and Vinegar: Pour a cup of baking soda down the drain followed by a cup of vinegar. Cover the drain and let the mixture sit for 30 minutes. Follow up with hot water to flush out the clog.
  • Commercial Drain Cleaners: Use a chemical drain cleaner to dissolve the clog. Follow the instructions on the label carefully and use protective gear such as gloves and goggles.
  • Salt and Baking Soda: Mix equal parts salt, baking soda, and vinegar to create a paste. Pour the paste down the drain and let it sit for several hours. Follow up with hot water to flush out the clog.

Professional Intervention

If you’re unable to clear the clog using manual removal methods or chemical and natural solutions, it’s time to call in a professional plumber. A licensed plumber like Plumber Warragul, has the tools and expertise to clear even the most stubborn clogs.

They can also identify and fix any underlying issues such as tree roots, septic tank problems, or older pipes.

Remember, prevention is key when it comes to clogged drains. Use a sink strainer or basket strainer to catch debris, and avoid pouring grease or oil down the drain. Regularly cleaning your plumbing system can also help prevent clogs from forming.


Can You Paint Straight Over Colorbond?

straight-painting-on-gutters
0 Comments

A Guide to Painting Colorbond Surfaces

If you have a Colorbond fence, you may be wondering if it’s possible to paint over it. The short answer is yes, you can paint straight over Colorbond. However, there are a few things you need to consider before you start painting. Let us have it with Gutter Cleaning near me.

straight painting on gutters

Firstly, you need to ensure that the fence is clean and free from any dirt, dust, or debris. This will ensure that the paint adheres properly to the surface. You can clean your Colorbond fence by using a soft brush or sponge and some soapy water.

Rinse the fence thoroughly with clean water and allow it to dry completely before you start painting.

Secondly, you need to choose the right type of paint for your Colorbond fence. It’s important to use a paint that is specifically designed for metal surfaces and is suitable for outdoor use. Look for a paint that is durable, weather-resistant, and long-lasting.

You may also want to consider using a primer before you start painting to ensure that the paint adheres properly to the surface and provides a smooth, even finish.

Preparation and Cleaning

Before painting your Colorbond fence, it is important to properly prepare and clean the surface to ensure the best possible adhesion and finish. This section will guide you through the necessary steps to prepare your fence for painting.

Assessing the Condition of Colorbond Fencing

Before beginning any painting project, you need to assess the condition of your Colorbond fence. Check for any peeling, cracking, flaking, or other damage that may affect the adhesion of the paint. If your fence is in poor condition, it may require additional preparation before painting.

Cleaning and Removing Debris

To properly clean your Colorbond fence, start by removing any debris or loose dirt from the surface. You can use a soft-bristled brush or a pressure washer on a low setting to remove any dirt, cobwebs, or other debris.

Next, use soapy water and a soft sponge to clean the fence surface. Be sure to rinse the fence thoroughly with water to remove any soap residue.

Applying the Primer for Enhanced Adhesion

Applying a primer to your Colorbond fence can help enhance adhesion and improve the overall finish of your paint job. Choose a primer that is specifically designed for use on metal surfaces, and follow the manufacturer’s instructions for application.

Before applying the primer, make sure the fence surface is clean and dry. Apply the primer in thin, even coats, and allow it to dry completely before painting.

Painting and Finishing

Choosing the Right Paint and Tools

When it comes to painting your Colorbond steel, choosing the right paint and tools is crucial for a successful outcome.

You can use either acrylic paint or exterior paint to paint your Colorbond fence. Acrylic paint is water-based and dries quickly, while exterior paint is oil-based and provides a more durable finish.

For tools, you have several options. You can use a roller, paintbrush, or spray paint. If you are using a roller or paintbrush, make sure to choose one that is suitable for the type of paint you are using. If you are using spray paint, you can use a paint sprayer to achieve an even finish.

It is also important to choose a paint supplier that provides high-quality paint and tools. Do your research and choose a supplier that has a good reputation and offers a warranty for their products.

Techniques for Painting Colorbond Steel

Before painting your Colorbond fence, make sure to clean it thoroughly and remove any dirt or debris. Once the surface is clean and dry, you can start painting.

If you are using a roller or paintbrush, apply the paint in long, even strokes. Make sure to apply a thin coat of paint and let it dry completely before applying another coat. If you are using spray paint, follow the manufacturer’s instructions and apply the paint in a sweeping motion. If you cannot handle the work, you can have Gutter Cleaning near me do it for you.

When painting Colorbond steel, make sure to pay attention to the weather conditions. Avoid painting on a rainy or windy day, as this can affect the finish of the paint. Choose a day with mild temperatures and low humidity for the best results.

Ensuring Longevity and Protection

To ensure the longevity and protection of your Colorbond fence, use high-quality paint and follow the correct painting techniques. You can also apply a protective coating to your fence to provide extra protection against the elements.

Most paint suppliers offer a warranty for their products. So, read the warranty information carefully and follow the instructions to ensure that your fence stays looking great for years to come.


How to Reshingle a Section of Roof:

man-reshingling-roofing
0 Comments

A Step-by-Step Guide

If you’re a homeowner, you may find yourself in need of reshingling a section of your roof. Whether it’s due to damage from a storm or simply wear and tear over time, reshingling can be a daunting task. However, with the right tools, safety precautions, and a little bit of hard work, you can successfully complete this DIY project.

man reshingling roofing

Before you begin, it’s important to prioritize safety. Make sure to wear appropriate clothing, such as non-slip shoes and gloves, and use a sturdy ladder that can support your weight. It’s also a good idea to have a partner to assist you and to never work on a roof alone.

When it comes to the right tools, you’ll need a pitchfork to remove the old shingles, a hammer to secure the new shingles, and a utility knife to cut the shingles to size. You may also need a pry bar, roofing nails, and a chalk line to ensure a straight edge. It’s important to have all of these tools on hand before you begin to avoid any unnecessary trips up and down the ladder. But if you are not confident doing the work and do not have enough tools, you can have Roofing West Palm Beach to do job.

Preparing for Reshingling

Before you start reshingling your roof, it is important to properly prepare the work area and gather all necessary tools and materials. This will help ensure that the job is completed safely and efficiently. In this section, we will go over the steps you need to take to prepare for reshingling your roof.

Assessing the Roof Condition

“The first step in preparing for reshingling is to assess the condition of your roof. Check for any signs of damage or wear and tear, such as cracked or missing shingles, soft spots on the roof deck, or leaks. If you notice any issues, it may be necessary to repair or replace the damaged areas before you can start reshingling.” said David Spade of Roofing West Palm Beach.

Gathering Necessary Tools and Materials

Once you have assessed the condition of your roof, you will need to gather all the necessary tools and materials for the job. Here is a list of some of the tools and materials you will need:

  • Utility knife
  • Hammer
  • Nail gun or stapler
  • Circular saw
  • Extension ladder
  • Caulk gun
  • Pitchfork or roofing shovel
  • Safety harness
  • Tape measure

In addition to these tools, you will also need roofing materials, such as shingles, nails, and underlayment. Make sure to choose materials that are appropriate for your climate and meet local building codes.

Setting Up the Work Area

Before you start reshingling, it is important to set up the work area properly. This will help ensure that the job is completed safely and efficiently. Here are some steps you can take to set up the work area:

  • Clear the work area of any debris or obstacles.
  • Lay down a tarp to protect the ground and catch any debris.
  • Set up your tools and materials within easy reach.
  • Use an extension ladder to access the roof safely.
  • Wear a safety harness to prevent falls.
  • Make sure the weather is dry and calm to avoid accidents and ensure that the roofing materials are weatherproof.

Executing the Reshingling Process

When you are ready to execute the reshingling process, there are a few key steps you should follow to ensure that the job is done correctly. This section will walk you through the process, step by step.

Removing Old Shingles and Underlayment

Before you can install new shingles, you must remove the old ones. Use a roofing shovel or pitchfork to remove the old shingles and underlayment. Be sure to dispose of them properly.

Installing New Underlayment and Flashing

Once the old shingles and underlayment are removed, you will need to install new underlayment and flashing. Start by installing drip edge flashing along the eaves of the roof. Then, install felt paper or a self-adhering membrane over the entire roof deck. Finally, install step flashing around any roof vents, chimneys, or walls.

Laying and Securing New Shingles

With the underlayment and flashing in place, you can now lay and secure the new shingles.

Start by installing a starter course along the eaves of the roof. Then, install the first course of shingles along the edge of the roof.

Make sure to offset the shingles so that the seams do not line up. Continue installing courses of shingles, making sure to stagger the seams and nail the shingles in place using roofing nails.

When you get to the ridge of the roof, install ridge caps to finish off the job. Be sure to follow the manufacturer’s instructions for installing the ridge caps.


What is a Flat Roof Called?

a-home-with-flat-roofing
0 Comments

A Clear Explanation

If you’re a homeowner or building owner, you may be wondering what a flat roof is called. Unlike sloped roofs, flat roofs have a low slope or no slope at all. They are commonly found on commercial buildings, but are also used on residential homes.

Flat roofs come in different types, and each type has its own set of advantages and disadvantages. Let us have it with David Spade of Star Roofing West Palm Beach.

a home with flat roofing

One type of flat roof is a built-up roof (BUR), which is made up of multiple layers of tar and gravel. Another type is a modified bitumen roof, which is a single-ply rolled roof that is impregnated with a mineral-based wear surface.

Torch-down systems involve heating the adhesive as the material is unrolled. Newer peel-and-stick systems are safer and easier.

Other types of flat roofs include EPDM rubber, TPO, and PVC roofing membranes. Each type has its own unique features and benefits.

Types and Materials of Flat Roofs

If you’re looking to install a flat roof, there are several types and materials to choose from. In this section, we’ll go over the most common types of flat roofs and the materials used to construct them.

Built-Up Roofing (BUR) Systems

Built-up roofing (BUR) is one of the oldest and most popular types of flat roofing systems. It consists of multiple layers of bitumen and reinforcing fabrics, such as fiberglass or organic mats. The layers are built up to create a durable, waterproof membrane.

BUR roofs are typically covered with a layer of gravel or other aggregate material to protect the roof from UV rays and to provide a non-slip surface for maintenance workers.

Membrane Roofing

Membrane roofing is a newer type of flat roofing system that has gained popularity in recent years. It consists of a single-ply membrane that is either mechanically fastened or adhered to the roof substrate.

Membrane roofing materials include EPDM (ethylene propylene diene monomer), TPO (thermoplastic polyolefin), and PVC (polyvinyl chloride). These materials are lightweight, flexible, and easy to install. They also offer excellent resistance to UV rays and other environmental factors.

Modified Bitumen Roofing

Modified bitumen roofing is a hybrid of BUR and membrane roofing systems. It consists of a single-ply membrane that is reinforced with a layer of modified bitumen.

Modified bitumen is asphalt that has been modified with rubber or other materials to improve its durability and flexibility. Modified bitumen roofing is easy to install and offers excellent resistance to UV rays and other environmental factors.

Advantages and Considerations of Flat Roofing

Durability and Maintenance

Flat roofs are known for their durability and longevity. They are designed to withstand harsh weather conditions, including high winds, heavy rain, and snow.

However, like any other roofing system, they require regular maintenance to ensure their longevity. Regular inspections can help identify potential issues such as leaks, cracks, and other damages. Timely repairs can help prevent further damage and extend the lifespan of the roof.

Installation and Cost Factors

Flat roofs are generally easier and quicker to install than sloped roofs. They require less material and labor, which makes them more affordable and cost-effective.

However, the cost of installation can vary depending on the type of flat roof, material used, and the size of the roof. It is important to consider these factors when choosing a roofing system for your commercial building. You can have Star Roofing West Palm Beach for a costless installation work.

Energy Efficiency and Environmental Impact

Flat roofs can be designed to be energy-efficient. This can help reduce heating and cooling costs. They can be insulated to prevent heat loss during the winter and heat gain during the summer.

This can help reduce the energy consumption of the building and lower its carbon footprint. Additionally, flat roofs can be made from recyclable materials. This can help reduce waste and promote sustainability.

Overall, flat roofs are a popular choice for commercial buildings due to their affordability, durability, and flexibility. They can be designed to meet the specific needs of the building and the climate in which it is located. However, it is important to consider the cost of maintenance and repairs, as well as the environmental impact of the roofing system.

By choosing the right roofing system and maintaining it properly, you can ensure the longevity and reliability of your commercial building’s roof.


What is a Day in the Life of a Private Investigator:

a-private-investigator-working-in-the-office
0 Comments

A Glimpse into the World of Surveillance and Investigation

Are you curious about what a day in the life of a private investigator looks like? Well, you’re in luck! Private investigation is a fascinating profession with a variety of tasks and an unpredictable schedule.

With Sherlock Holmes of Ali Private Investigator Tampa, we’ll take a closer look at what it’s like to be a private investigator and what you can expect from a typical day on the job.

a private investigator working in the office

Private investigators are professionals who are hired to gather information and conduct investigations on behalf of individuals, businesses, and organizations. They may work on a wide range of cases, from missing persons to fraud investigations, and their work can involve anything from surveillance to background checks.

As a private investigator, your job is to gather evidence and information that can be used to help your clients achieve their goals.

The life of a private investigator is anything but boring. With a variety of tasks to complete and an unpredictable schedule, no two days are ever the same.

Private investigators may spend their mornings conducting research and planning their investigations. Then, they spend their afternoons conducting surveillance and gathering evidence. Finally, they spend their evenings writing reports and reviewing their cases.

The work can be challenging, but for those who are up for the task, it can also be incredibly rewarding.

Pre-Investigation Activities

Before a private investigator (PI) can begin an investigation, they need to perform several pre-investigation activities. These activities are crucial in ensuring that the investigation is conducted legally, ethically, and efficiently. If you are looking for a private investigator, just go to Ali Private Investigator Tampa.

Client Consultation and Case Review

The first step in any investigation is the client consultation. During this meeting, the PI will discuss the details of the case with the client, gather information about the subject of the investigation, and determine the client’s goals and expectations.

This consultation is important as it helps the PI to understand the scope of the investigation and develop a plan for how to proceed.

After the consultation, the PI will conduct a thorough case review. This review involves analyzing all the available information about the case, including any documents or evidence provided by the client.

This step is critical in ensuring that the investigation is conducted legally and ethically. The PI needs to ensure that they have a valid reason for conducting the investigation and that they have the legal authority to do so.

Planning and Research

Once the PI has completed the client consultation and case review, they will begin planning and research.

This involves developing a strategy for how to conduct the investigation, including what methods and techniques to use. The PI will also conduct research on the subject of the investigation, including background checks, database searches, and public records.

In today’s world, technology plays a critical role in the planning and research phase of an investigation. PIs use a variety of tools and software to gather and analyze information, including social media, open-source intelligence (OSINT), and specialized databases.

Legal and Ethical Considerations

Throughout the pre-investigation phase, PIs must be aware of the legal and ethical considerations involved in conducting an investigation.

PIs must have a valid license to operate as a private investigator and must adhere to the laws and regulations governing their profession.

PIs must also be aware of the ethical considerations involved in conducting an investigation, including the importance of truth and accuracy.

PIs must be truthful in their interactions with clients and subjects of the investigation. They must also ensure that they do not violate anyone’s privacy or civil rights.

Active Investigation Work

As a private investigator, a significant part of your job involves actively conducting investigations. This work can be exciting and dynamic, but it also requires a great deal of patience, adaptability, and concentration.

Conducting Surveillance

One of the most common tasks in an investigation is conducting surveillance. This involves observing and tracking the movements of a subject to gather evidence and information.

Covert surveillance is often used, which means you need to be able to blend in with your surroundings and avoid being detected.

To conduct surveillance effectively, you need to be familiar with the area you are working in and have a good understanding of the subject’s routine.

You may need to use a car or other means of transportation to follow the subject discreetly. You will also need to be able to track digital footprints and use cameras and notes to collect evidence.

Gathering and Organizing Evidence

Collecting evidence is a crucial part of any investigation. You need to be able to gather information from a variety of sources, including interviews, surveillance, and digital records.

Once you have collected the evidence, you will need to organize it in a way that makes sense and is easy to understand.

This may involve creating a formal report that outlines your findings and includes any relevant evidence. You may also need to work with other investigators or law enforcement officials to ensure that the evidence is admissible in court.

Interviews and Interrogations

Interviewing witnesses and suspects is another important aspect of detective work. You need to be able to ask the right questions and gather information in a way that is both efficient and effective.

This requires excellent communication skills and the ability to read body language and other nonverbal cues.

When conducting interviews and interrogations, you need to be able to remain calm and professional. This is important even in tense or emotional situations. You will also need to be able to uncover the truth and identify any inconsistencies in the information you are given.

Overall, active investigation work as a private investigator requires a broad range of skills and knowledge. You need to be able to adapt to different situations and remain focused and detail-oriented at all times.

By conducting surveillance, gathering and organizing evidence, and conducting interviews and interrogations, you can help uncover the truth and provide valuable information to your clients.


What is the Average Price to Fix a Hole in the Roof? A Comprehensive Guide to Roof Repair Costs

man-fixing-hole-in-a-roof
0 Comments

What is the Average Price to Fix a Hole in the Roof? A Comprehensive Guide to Roof Repair Costs

If you’re a homeowner, roof repair is likely something that you’ll have to deal with at some point. One common issue that homeowners face is a hole in the roof. A hole in the roof can lead to water damage and other problems if it’s not fixed promptly.

man fixing hole in a roof

So, what is the average cost to fix a hole in the roof? According to a variety of sources, including Angi, Homewyse, and This Old House, the cost can range from $100 to $1,755. The national average cost is around $1,067. Of course, these are just estimates, and your actual cost may be higher or lower depending on your specific situation.

Factors that can impact the cost of fixing a hole in the roof include the extent of the damage, the type of roofing material, the location of the hole, and the cost of labor in your area.

It’s important to get an accurate estimate from a qualified roofing contractor like commercial roofing nj before proceeding with any repairs.

With that said, let’s take a closer look at some of the factors that can affect the cost of fixing a hole in the roof.

Assessing Roof Damage and Repair Needs

When it comes to assessing roof damage and repair needs, there are a few things you should consider.

First and foremost, it’s important to determine the extent of the damage. This will help you determine what type of repair is needed and how much it will cost.

Determining the Extent of Damage

The extent of the damage can vary greatly, from minor repairs such as patching a small hole or replacing a few shingles, to major repairs such as fixing sagging or replacing an entire section of the roof.

To determine the extent of the damage, you should conduct a thorough roof inspection. Look for any signs of leaks or water damage, such as water stains on the ceiling or walls, or mold and mildew growth. You should also check for any areas of the roof that are sagging or appear to be damaged.

Types of Roof Repairs

Once you have determined the extent of the damage, you can then determine what type of repair is needed.

Some common types of roof repairs include patching small holes, repairing leaks, replacing damaged shingles, and fixing truss or vent damage.

The cost of each type of repair can vary depending on the extent of the damage and the type of repair needed.

Minor repairs such as patching a small hole or replacing a few shingles can cost anywhere from $100 to $1,000, while major repairs such as fixing sagging or replacing an entire section of the roof can cost upwards of $15,000. Emergency roof repairs can also be more expensive, as they often require immediate attention and may require more extensive repairs but commercial roofing nj offers less cost.

Cost Factors for Roof Repair

When it comes to repairing a hole in your roof, the cost can vary depending on several factors. Here are some of the main cost factors that can affect the price of roof repair.

Material and Labor Costs

The cost of roof repair can be influenced by the type of material used for the repair and the labor required to complete the job.

For instance, the cost of repairing a roof made of asphalt shingles may be different from the cost of repairing a roof made of metal, slate, tile, or wood shakes. Labor cost can also vary depending on the complexity of the repair and the expertise of the roofer or professional you hire.

Roof Features and Complexity

The design and features of your roof can also affect the cost of repair.

A roof with skylights or flat roofs may require more labor and materials to repair than a standard pitched roof. Additionally, the complexity of the repair, such as the need for flashing replacement or repair, can also add to the overall cost.

Geographical Location and Season

The location of your home can also influence the cost of roof repair. For example, repair costs may be higher in areas with higher costs of living or where permits are required.

Additionally, weather and season can also affect the cost of repair. Repair costs may be higher during peak roofing seasons or in areas with harsh weather conditions.

Overall, the national average cost of roof repair is $1,067, but the actual cost can vary depending on the size of the roof, roofing material, labor, and other cost factors.

By understanding these factors, you can better estimate the cost of repairing a hole in your roof and ensure that you are getting a fair price for the repair.